Sit and Spin a bit with me
Over the past 5 1/2 years that I have been spinning, I've been blessed with many friends who have taught me some of the "tricks of the trade". One of my favorite aspects to this creative art is how freely spinners share their knowledge. While I am by no means an expert, I'd love to share with you something I have learned. Will you spin a bit with me?
Our Sock Hop spinning has greatly enhanced my skills. (perhaps it's the gazillion pounds I've spun?) and Cheryl - of New Hue Handspun has taught me alot. (Cheryl has been our highest volume spinner of Sock Hop Yarn since we began last spring - alas, she has no blog..) While there is no "perfect" way to spin, there are indeed a few wonderful techniques that have made my life easier.
Many of you have written and asked me questions about how tight to ply, and how to add on to plyed yarn - so here's a small pictoral view of what I've been talking about:
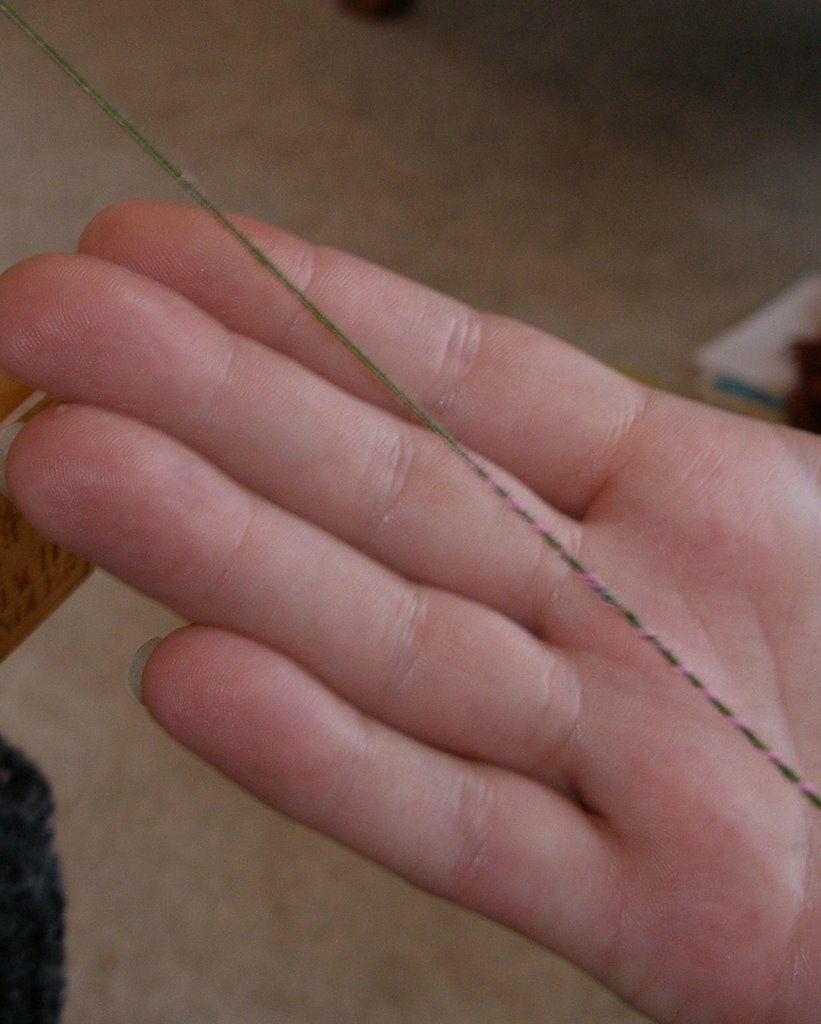
When we spin for the Sock Hop, we add a bit of "overtwist" when
 plying - instead of having a completely 'balanced' yarn while you are plying, you'll want to have it twist a bit more snuggly on itself. The result, after you have washed your yarn will be a springy, snug sock yarn. How much overtwist, you ask? well - here's what I'm doing... this is what it looks like if I relax the tension on my newly plyed yarn:
I've been a tad bit fussy about certain aspects of the Sock Hop (*grin*) - One of my requirements is that the skeins have no knots in them. (it's a pet peeve of mine - to buy commercial yarn that has knots - ). Anyway, here we are, spinning along.. a pound at a time, wanting six skeins/pound with no knots.
I don't know about any of the rest of you, but my bobbins do not hold a pound of plyed yarn :-) So what do we do about adding on new singles to the plyed yarn remnants that are left on the bobbin? The following is the cool technique that Cheryl taught me.
Step One: Pull about 6 inches of plyed yarn back out through your orafice -

Untwist the yarn into two singles once again... about 4 inches worth.
Break one of the singles off so that it is about 3-4" shorter than the other end. Hang onto your two seperate ends, for they will want to twist back together..
Step Two:
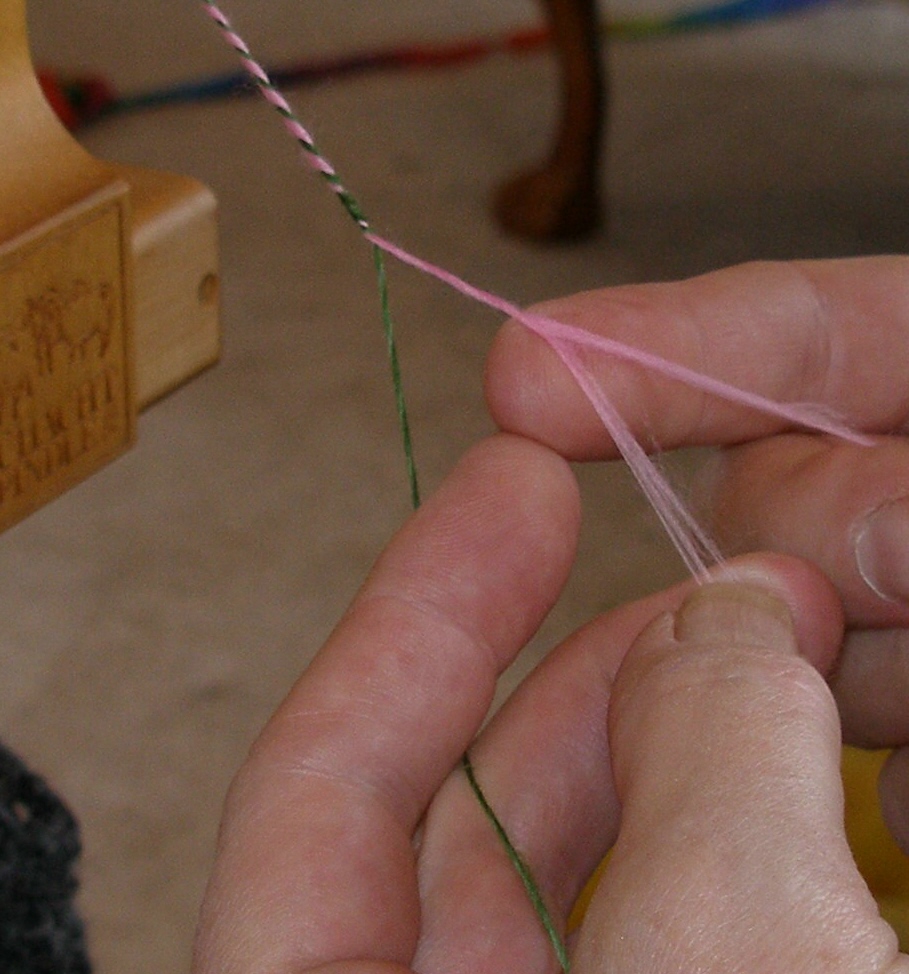
Split the short end that you've just broken -
opening it up into two pieces, so it looks like this:
Step three:
Pick up the end from one of your full bobbins of singles that you want to attach, and lay it between these two split
 ends (from step two) Gently wrap the two split ends around the new single, and roll a tiny bit with your fingers (all the while holding onto it a bit firmly. (yes, it feels as though one needs six hands at this very moment! - I've been known to use my knees to hold one end of the loose singles.. but feel free to use your mouth, toes, husband's hands.. whatever) You'll get the hang of this - trust me.. it gets easier with practice.
Step four:
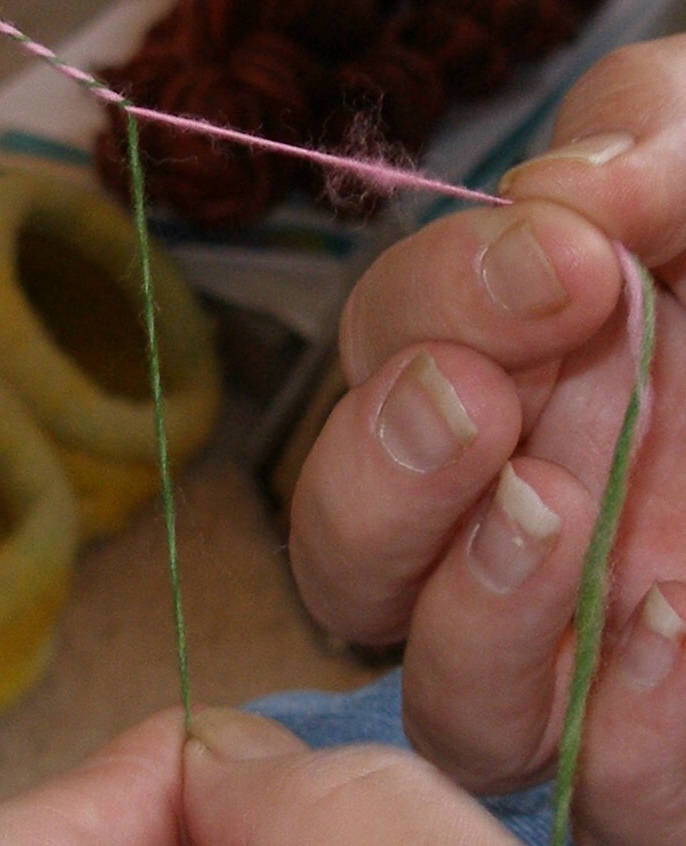
Next, you want to advance
 your wheel a few turns, allowing the twist to move down over the previously wrapped section of the yarn... all the while, holding tightly onto the second single end that you are going to be working with next... don't let go of this second end, or you'll have to start all over again.
Step five:
Split the second part of the yarn from your wheel, exactly like you did with the first half.
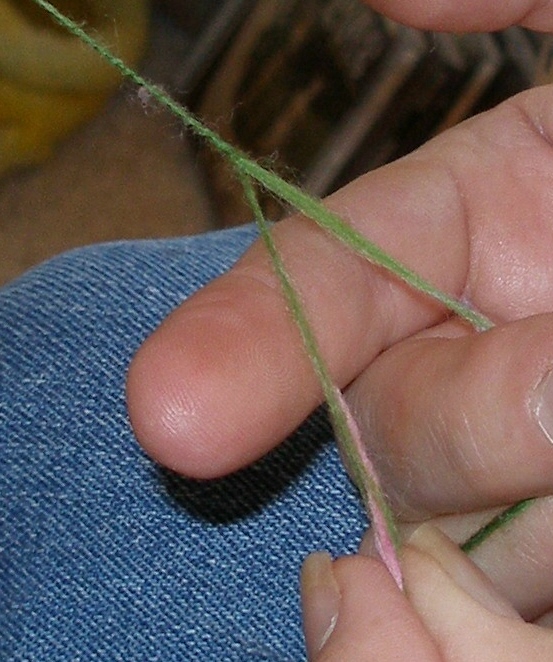 Lay the end from your other full bobbin of singles between the split, and again roll a bit with your fingers so they stay together. (a little mositure helps now and then)
Step six - the finale !
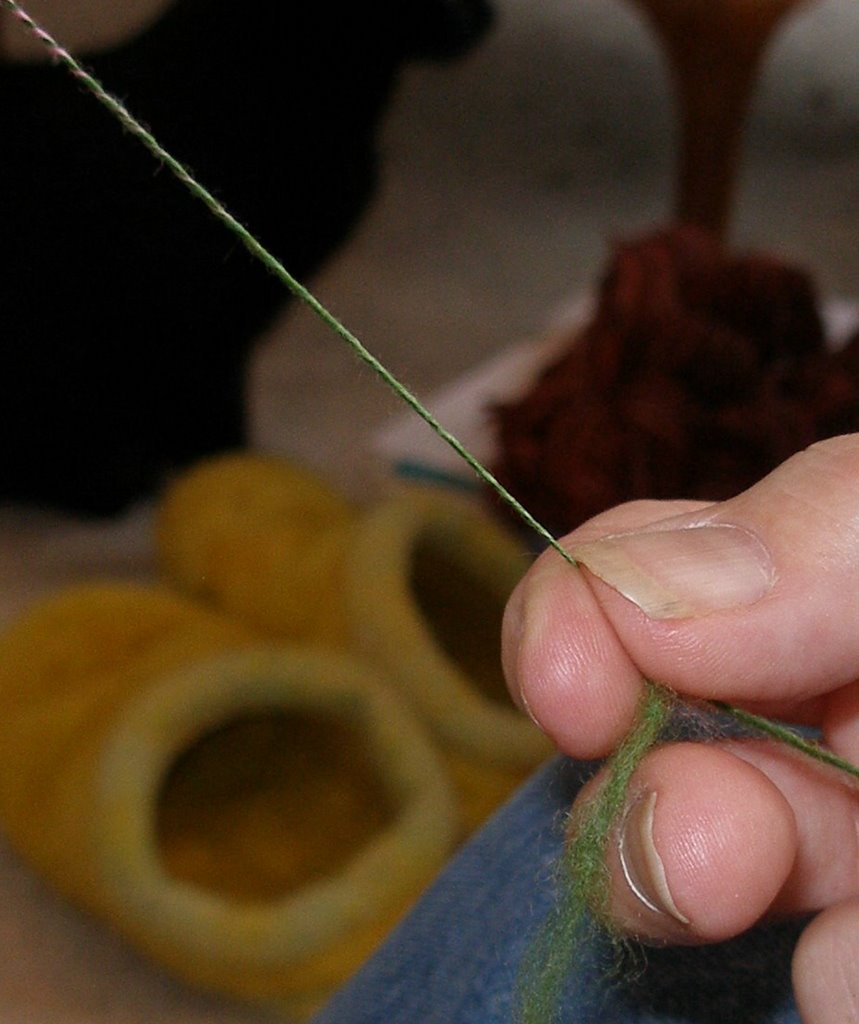
Advance
 your wheel a little bit more, and you have now completed the invisible join onto the plyed yarn that was left on your wheel , and you're ready to continue plying along :-) No knots!!!!
At this point - I usually take a large exhaling breath, get up from the wheel, stretch my legs and grin like a cheshire cat for a few mintues. I love it when it works.
If you end up with a tangled mess, (as I still do at times - despite the hours of practice) - you can always go back to step one and try again. Isn't it great?
Let's all take a moment to send out a cheer to Cheryl.
And on the local scene, it stopped raining enough this morning for me to catch a snapshot of a few of our critters. We've added two young girls cashgora goats to our flock. (I
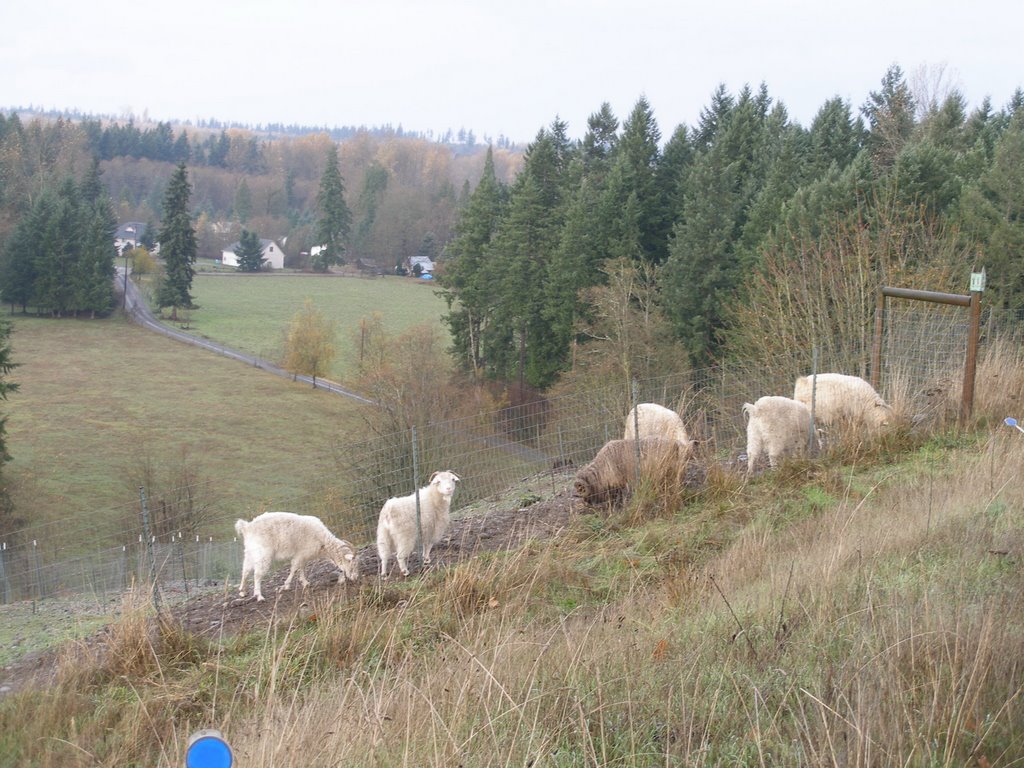 think that my shepherd was missing his enormous flock of goats) These two lovelies came from our flock a couple of years ago, and the new owners have graciously allowed us to "borrow" them. We're noticing that our billy goats have been a bit randy as of late, and
 we're hoping for some babies in the spring!
posted by Teyani @ 9:47 AM
![]()


17 Comments:
I am plying my sock hop fiber now. Your tips are quite timely!
I'll have to remember all of these little tips and tricks.
Thank you! I had always wondered if there was a better way than the spit method.
Thanks for the pictorial, Teyani. It answers a number of questions I've had.
What a great tip! Thanks for sharing with the rest of us.
Now that is a cool tip! I'm going to have to try that!
Thanks for the tutorial/tips Teyani - very informative! I am so glad that you hate the knots; there is so seriously nothing worse to me than the knots you have to untie and then fix. Your sock hop yarn is just the best!
Yay Cheryl! What a great technique! Thanks for the tutorial.
Thanks for the tutorial I have been spinning for YEARS and did not know that one. On another note my 19 year old daughter bought roving from you and spun and knit a scarf her own pattern. she could not afford Rowan being a student.
It can be found at the bottom of this blog page. http://sheepshepherdess.typepad.com/sheepshepherdess/2006/10/index.html
Thank you for the tip. I have been attempting something like this with my spindle spinning, but twist likes to advance faster than I can usually control it. At least I know I'm on the right track.
Cute goaties!
Fantastic pictures! I'm so glad you posted this little tutorial. I still have so much to learn and I'll defnitely remember this one. Thanks!
Wow, you do know of course to a "i wanna spin yarn someday" person you've just scared me half to death with all that don't you? (smirk) It looks soooo complicated. I love however seeing how it all comes together. Makes me admire your work even more!
I'll have to forward this on to my sister - she's the spinner - and I'm sure she can use the tips!
Yeah to Cheryl! I may need that trick now that I am spinning again, small scale spinning though, I measure in grams not pounds. Great tutorial. Thanks for sharing.
Wow - thanks for all that info!
Love the pics of the "girls."
Thanks for the great tutorial! Very helpful information indeed. I'd been wondering how to get long yarn without knots. Now to practice it on a spindle.
Just to show my ignorance, do you usually join contrasting, or opposite plies, or is that mainly for the sake of being able to see it in the photos?
Not a spinner yet, but that was fascinating =) very cool
Post a Comment
<< Home